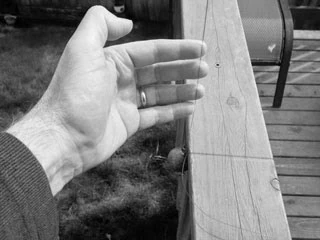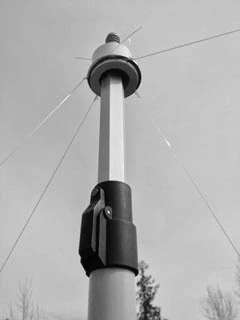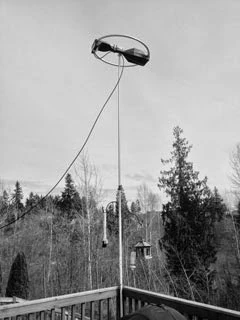
Setting up a good portable radio antenna mast can be a bit of a challenge. A good portable mast can be deployed easily and quickly. It should be strong enough to support the antenna. It also should be stable enough to withstand moderate wind.
A good mast can be created using a long painter’s pole. A thick walled painters pole can serve as an antenna mast when it is not being used for painting. If you choose to use a painter’s pole, be sure to find the type that can be extended upward for best portability. Make sure the type of pole chosen is one that has a locking mechanism that hold the section in place. Some painter’s poles rely on twisting motion to lock the pole in place. This holds the section in place with friction. This is NOT a good solution for anything heavy. The locking mechanism is the way to go. This will prevent the antenna from unexpectedly dropping to the ground. Also, keep in mind that the more sections in a painter’s pole, the weaker the mast will be.
Side to side stability can be easily attained by using non-conductive guy wires. I suggest if the mast is going to be used in a high traffic area, use brightly colored rope. In a longer term installation, dark colored rope can be used. If you need a more stealth-like version, use fishing line intended for large fish (deep sea fishing line). The heavy duty fishing line is invisible at a distance. Weights can be added to the fishing line to take up excess slack when the mast is lowered (not in use). I have not studied the effect of ultraviolet light on this type of line, so it might need to be replaced annually. Keep in mind the line is not meant to be load bearing. It is for stability. A heavier line will withstand moderate wind. Under high wind conditions, antennas should be taken down.
Attaching guy wires to a mast is a challenge. Here is a method. My painter’s pole has hardware that fastens the thread to the pole. I found a PCV coupling link that is normally used to join two dissimilar diameter PCV pipes together. The PVC link fits the top of the pole very well. The hardware that attaches the tread on the pole protrudes outward from the pole. The PVC link cannot slide past the hardware on the pole. A 50 mm diameter welder’s ring can be used as an attachment point for the guy wires. The ring slides onto the PCV link. This makes the system very portable. This is a lot better than attaching the guy wires directly to the pole. I call my contraption the Floating Guy Wire Attachment. This attachment does not interfere with the treads on the pole.
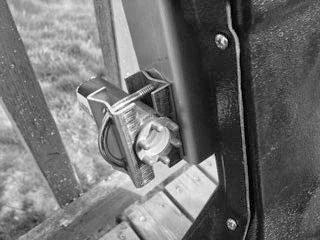
The treads are used for the antenna attachment. A modified paint roller attachment can be used for antenna mounting. It is best to find the most durable attachment for the threaded portion of the pole. Only the female treads and part of the paint roller handle body is needed. The rest of the paint roller assembly can be cut away. The paint roller handle is the attachment point for the antenna. Most plastic handles will break under the stresses. I was able to find a metal paint roller attachment. The metal handle gives it the durability needed. The connection from the pole to the handle is an enormous stress point. The handle in the photo is unique in that it has standoffs in place to reduce the stress placed on the treads. These standoffs prevent the handle from being bent from side to side.
Attaching the antenna is easy. Lift the antenna and roll the pole until the treads are hand tight. Do not over tighten the treads. Doing so will make the antenna’s removal very difficult. If the antenna is too heavy, the attachment can be made a ground level. The pole with the antenna can be hoisted into position. This puts a lot of stress on the handle and the treads. Do this only is the treads and the handle are durable metal.
The antenna can be raised soon. It is important to address cabling. In the photo of the antenna with the cable attached, you can see there is a stress relief tie off point. The cable used here is low loss LMR400 cable. It is a heavy cable. Due to its weight, the connectors can easily be damaged if it has to support the weight of the cable. A stress relief tie off is very important. In the photo, the tie off was made where the antenna mounts to the pole. The tie off can be anywhere you need it. I used the mount point of the antenna because it is easy to attach. Velcro strips can be used to tie the cable to the pole in a few places to keep the setup neat looking.
Once the stress relief is in place, the cable can finally be attached to the antenna. Perform this step last. It is important to connect the cable at the last possible moment because twisting motion on the cable will ruin the connector.
Once the cable is connected, raise the antenna mast. You are free to use the radio spectrum.
Usually I take down my antenna and store it indoors when I am finished transmitting. I do this for two reasons. The antenna is not exposed to the elements for too long and I do not have an antenna that is visible to onlookers for a long time.
